

Manage Your Teachers, Students and Parents Through Single AI Platform
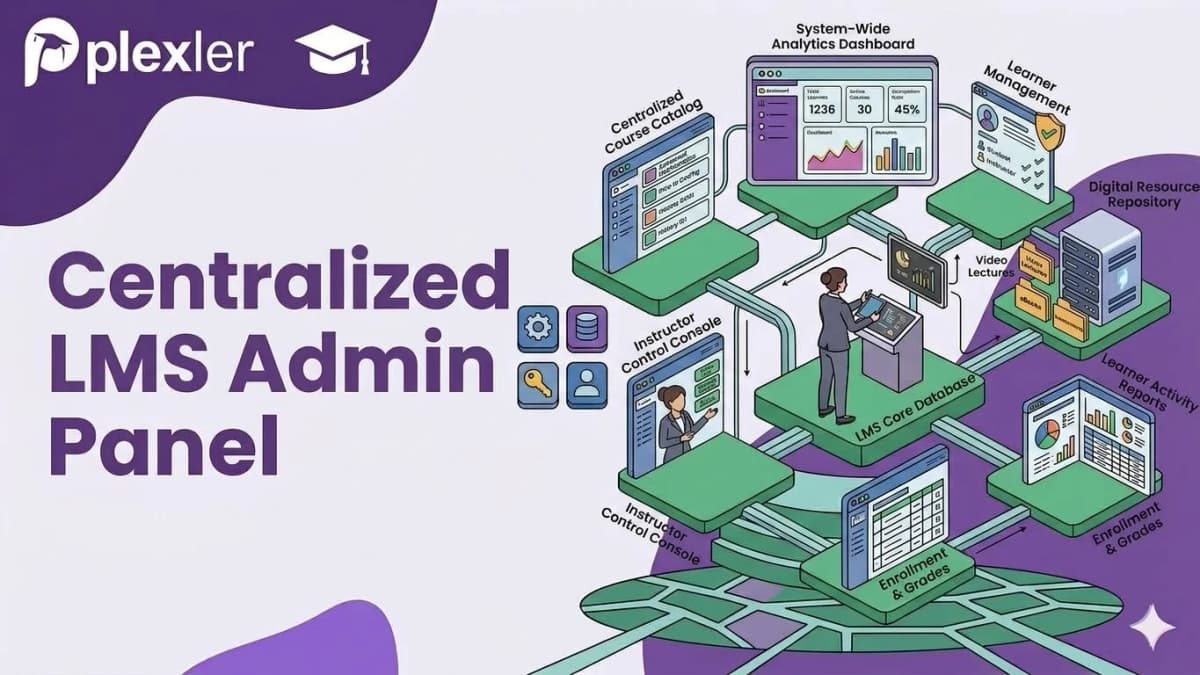
The admin module is where you get a complete view of your Plexler LMS. Teachers, students, and parents are the key parts of any learning platform, but the admin has the highest level of control.
From managing users and courses to keeping track of learning activities and overall performance, the admin module brings everything together in one place.
So, let’s take a look at the main tools and features available on the admin side of Plexler.
Dashboard
The first menu you’ll find on the panel is the Dashboard. It gives you a quick overview of the most useful information, all in one place.
Here, the admin can see key metrics such as the total number of students, teachers, parents, classes, subjects, and more.
You can also take action directly from the dashboard. For example, you can go to Manage Students or Manage Teachers to view and manage them.
Although student and teacher management are separate features within the admin module, the dashboard gives you a quick way to access both.
So, instead of going through different sections just to check the basic numbers, the dashboard gives you a clear snapshot of what’s happening across the platform.
Activities
Just like with students, Plexler’s admin module gives you a wide range of controls for managing teachers. The good thing is that you can access most of these controls without jumping through multiple menus.
The interface shows a list of teachers along with details such as their ID, email, active status, registration date, and other available options.
Under the Action menu, the admin can perform several tasks. You can onboard a new teacher, send a welcome email, set their password and login credentials, and view their activity within the system.
You can also edit the teacher’s profile directly from this menu.
But one of the most important parts here is permission control. It gives the admin control over what each teacher can access and what they can do inside Plexler.
For example, under the Question Bank Builder, the admin can control permissions for viewing the Question Bank page, using the Question Bank Builder, creating PDFs, editing published questions, and viewing global questions.
Engagement Reports
Engagement Reports might seem similar to the Activities section, and that’s true to some extent. But it takes things a step further by presenting the data visually in one place.
It keeps activity data for teachers and students for up to 90 days, giving admins a better view of what’s happening over time. You can also use the advanced search option to find specific records, including searching by email.
From here, the admin can quickly identify the latest activity, the most active individuals, and other useful activity data across the institution.
Unlike the Activities section, Engage Reports does not include parent and guest activity. Instead, it focuses on the information that matters most for understanding how teachers and students are using the platform.
So, you can think of Engage Reports as a quick snapshot of what’s happening across your institution, presented in a simple and easy-to-understand way.
Students
This section of the admin module is designed to manage everything related to students.
It has the same filter options as teacher’s, which help the admin quickly find the student they’re looking for. You can search by email, class, or board, and then simply click the search button to get the results.
The dashboard also shows the active status of students, so the admin can quickly see who is active on the platform.
From here, you can edit a student’s details, including their name, email, login password, phone number, assigned teacher, profile image, and ID card photo. So, all the important student information is available in one place.
Right next to the edit option, you’ll find the Deactivate button. This allows the admin to stop a student from accessing the system when needed.
You can also remove email verification, delete the student account, and check the student’s learning progress.
Under the Student Report section, you can find details such as student identification, subject reports, report card history, and attempted assessments.
So, from basic student information to learning progress and assessment history, the admin can manage everything from this section.
Manage Teachers: Control Teacher Access
Just like with students, Plexler’s admin module gives you a wide range of controls for managing teachers. And the good thing is, you can access these controls without going through multiple menus.
The interface gives you a list of teachers with details such as their ID, email, active status, registration date, and other available options.
Under the Action menu, you’ll find a group of controls that lets you manage teachers from one place. You can onboard a new teacher, send a welcome email, set their password and login credentials, and view their activity within the system.
You can also edit the teacher’s profile directly from this menu.
But among all these options, one of the most important controls is Permissions.
Plexler allows the admin to decide what each teacher can access and what they can do inside the platform.
For example, under Question Bank Builder, you can control access to the Question Bank page, Question Bank Builder, PDF creation, editing published questions, and viewing global questions.
Under Assessment Creation, you can control access to assessment creation from the question bank and the AI-assisted assessment picker.
There is also a separate permission for Assessment Review, so the admin can decide which teachers are allowed to review assessments.
You can also manage permissions for subject report cards, class-wise analytics, and class teacher report cards. The admin can even assign a teacher as a class teacher from here.
And that’s not all. There are permissions for creating formula lists, competency-based questions, and case studies, along with access to paper checking.
The paper-checking permission is especially useful. It allows a teacher to upload a student’s paper in PDF format. Plexler can then read the paper using OCR, and its AI feature can evaluate and grade it.
Finally, the admin can also control a teacher’s class access and board access.
So, this section gives the admin much more than basic teacher management. It provides detailed control over what each teacher can access, create, review, and manage within Plexler.
Parents
Through this section, you can create and link a parent with a student.
The admin just needs to enter a few basic details, such as the parent’s name, phone number, and email address, and then link the parent with the student.
So, it gives the admin a simple way to keep parent and student accounts connected within Plexler.
Previous Years Questions
From this section, the admin can upload previous years’ question papers for different classes and subjects.
You’ll find two main sections here. The first one shows a list of previously uploaded question papers, organized by class and subject. This also works as a search area, so you can quickly find questions from past papers.
The second section is for uploading new question papers. When uploading a paper, you can select details such as the class, subject, board, year, and question set.
Once the question paper is uploaded, Plexler processes the questions and makes the content and images available through DeepThink and the student chat.
This gives students an easier way to access and work with questions from previous years directly through the platform.
Questions Bank
The Question Bank is basically a collection of all the questions created on the platform in different formats.
You can find different types of questions, such as quizzes, subjective questions, objective questions, fill-in-the-blanks, and many other formats.
It also works as a filter to help you find the exact questions you’re looking for. You can filter questions by class, subject, chapter, and question type.
There’s also another useful filter for difficulty level, so you can quickly find questions based on how easy or difficult they are.
Issues/Support
The Issues / Support section is where the admin can keep track of problems reported by teachers and students while using the learning platform.
Here, you’ll find a list of reported issues along with their current status, such as pending, in progress, resolved, or closed.
The admin can see who submitted the issue, when it was submitted, and the description of the problem.
Once an issue is reported, the admin can review it and update its status. Depending on the issue, the admin can handle it directly, report it to a higher-level authority, or send it to the technical team for further support.
So, this section gives the admin one place to keep track of reported problems and their progress.
Registration Help
Plexler requires a Gmail address for student registration. But what if a student doesn’t have an email account? That’s where Registration Help comes in.
Through this section, the admin can help register a student who doesn’t have a Gmail account and enroll them into the classroom.
So, instead of leaving a student out because they don’t have an email address, the admin can help complete their registration from here.
Notification
The Notifications section allows the admin to send in-app notifications directly to students.
You can create a notification by adding a title and message, with the message supporting up to 2,000 characters.
There are different notification types available, such as announcements, reminders, study materials, and feature updates.
You can also choose who receives the notification. It can be sent to all students, a specific class, or a specific student.
So, whether you want to announce something to everyone or send a specific update to just one student, the admin can manage it directly from this section.
Subscription
The Subscription module allows the Plexler admin to manage subscription plans for teachers and students. The admin can control different subscription settings, including the trial period, monthly price, and yearly price. The admin can also search through the list of users and teachers to view and manage their subscription details.
Payment
Payment is another important area that the Plexler admin can manage. The system supports different payment methods, including digital wallets such as eSewa and Khalti, as well as Fonepay and bank payments.
The payment dashboard gives the admin a quick overview of all payment activities. It displays important details such as the payment date, user, payment portal, amount, payment status, transaction ID, and other relevant information. This helps the admin track and manage payments from a single place.
Plexler’s Admin Module gives you centralized control over key areas such as user management, teacher management, permissions, enrollment, payments, subscriptions, and more. These tools give admins greater control over the learning platform and its day-to-day operations.
If you’re looking for an AI-powered system for your institution like Plexler, let us know about your requirements and see how it can fit into your learning environment.